This is a traditional applique pattern called orange peel. Because this is the yellow month, we should probably be calling it the lemon peel. There are SO many ways to prepare a block for applique. Enthusiasts will swear by a particular method, but to be honest, it is all a matter of taste. I’m going to walk through a method today for freezer paper and glue stick. Next time I think I will give back basting a try. Feel free to use the method that works best for you. Please leave a comment with your favorite method to give everyone an idea of some of the other choices.
First, print out the lemon peel template. I used the very high tech method of finding a plate to trace around in order to make this template. A dinner plate made a skinnier peel while a saucer made a wider peel. I wanted to make a template that would fill most of the diagonal of the background square while still leaving room for the seam allowance. I just did trial and error until I found something that seemed to be the a nice size. Hopefully you will just be able to print and go.
After printing out your template, you will need to transfer it to freezer paper. You can trace it onto the non shiny side with a pencil, or just rough cut the pattern and staple it to a piece of freezer paper. This method works really well if you are making multiple templates. For the sampler, we will just need one, but you might want to make more blocks later. This is such a great carry along project.
Place the shiny side of the template down onto the right side of our fabric and iron it. The wax will stick temporarily to the fabric making it stick magically.
Now for the controversial part. Elmer's Washable glue will hold your seam allowance in place until you are done sewing it to the background. Not everybody is crazy about using glue on a quilt. It is temporary and will get washed out after the applique stitching. Feel free to use an alternate method. I like the firm and crisp edge the glue leaves, but it does leave you piece a bit stiff which means it is easier to sew down using a thimble.
Lightly spread glue on the quarter inch seam allowance on the wrong side of the fabric. Don't glue the entire block right away, it is easier to glue a little bit at a time so that you can manipulate the fabric until the edges are perfect.
Now use your fingers or a rosewood stick to fold the glued fabric down to the wrong side of the fabric. Feel free to wiggle the fabric a bit while the glue is wet to get the edges of the block nice and smooth. Notice that the pointy end is folded down and then the sides overlap. Move onto the next section and continue to prep the edges until you get back to where you started.
Iron the fabric from the right and the wrong side to get your seams firmly fixed.
Now that the applique is prepped, you can peel the freezer paper away. This template may be reused several times if you are making multiple blocks.
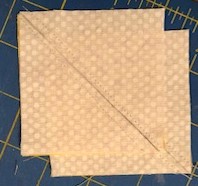
Select a 5 inch square of background fabric and press it lightly to find the center of the block. Center your peel along the creased line. You may pin or glue your block into place on a temporary basis. Now that it is prepped, it is easy to tuck it into a bag or purse so that you can work on it anytime and anyplace. All you will need is a needle and thread to sew the lemon peel down with a blind hem stitch.
Confession time. I haven't finished the handwork on my yellow block yet. Here is a red version that I made for practice over winter break. Just take your finished block to a sink and give it a quilt dunk to remove the glue. Feel free to remove the background fabric from behind the lemon peel if you think you might be hand quilting the sampler quilt at some point in the future.
This block should be set straight and will be the last of the yellow sampler blocks.


