Tuesday, February 26, 2019

Tiny Tuesday #9

This is a traditional applique pattern called orange peel.  Because this is the yellow month, we should probably be calling it the lemon peel.  There are SO many ways to prepare a block for applique. Enthusiasts will swear by a particular method, but to be honest, it is all a matter of taste.  I’m going to walk through a method today for freezer paper and glue stick. Next time I think I will give back basting a try. Feel free to use the method that works best for you.  Please leave a comment with your favorite method to give everyone an idea of some of the other choices.
 First, print out the lemon peel template.  I used the very high tech method of finding a plate to trace around in order to make this template.  A dinner plate made a skinnier peel while a saucer made a wider peel.  I wanted to make a template that would fill most of the diagonal of the background square while still leaving room for the seam allowance.  I just did trial and error until I found something that seemed to be the a nice size.  Hopefully you will just be able to print and go.  

After printing out your template, you will need to transfer it to freezer paper.  You can trace it onto the non shiny side with a pencil, or just rough cut the pattern and staple it to a piece of freezer paper.  This method works really well if you are making multiple templates.  For the sampler, we will just need one, but you might want to make more blocks later.  This is such a great carry along project.

Place the shiny side of the template down onto the right side of our fabric and iron it.  The wax will stick temporarily to the fabric making it stick magically.

 Now that you know exactly how big the finished peel will be,cut around the template leaving roughly a quarter inch seam allowance.  Don't worry about making it perfect, the template will stay put until your peel is perfect. 
 Now for the controversial part.  Elmer's Washable glue will hold your seam allowance in place until you are done sewing it to the background.  Not everybody is crazy about using glue on a quilt.  It is temporary and will get washed out after the applique stitching.  Feel free to use an alternate method.  I like the firm and crisp edge the glue leaves, but it does leave you piece a bit stiff which means it is easier to sew down using a thimble. 
 Lightly spread glue on the quarter inch seam allowance on the wrong side of the fabric.  Don't glue the entire block right away, it is easier to glue a little bit at a time so that you can manipulate the fabric  until the edges are perfect. 
 Now use your fingers or a rosewood stick to fold the glued fabric down to the wrong side of the fabric.  Feel free to wiggle the fabric a bit while the glue is wet to get the edges of the block nice and smooth.   Notice that the pointy end is folded down and then the sides overlap.  Move onto the next section and continue to prep the edges until you get back to where you started. 
 Iron the fabric from the right and the wrong side to get your seams firmly fixed. 
Now that the applique is prepped, you can peel the freezer paper away.  This template  may be reused several times if you are making multiple blocks.  
 Select a 5 inch square of background fabric and press it lightly to find the center of the block. 
 Center your peel along the creased line.  You may pin or glue your block into place on a temporary basis.  Now that it is prepped, it is easy to tuck it into a bag or purse so that you can work on it anytime and anyplace.  All you will need is a needle and thread to sew the lemon peel down with a blind hem stitch. 
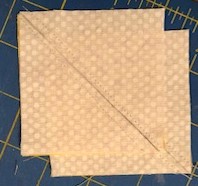
Confession time.  I haven't finished the handwork on my yellow block yet.  Here is a red version that I made for practice over winter break.  Just take your finished block to a sink and give it a quilt dunk to remove the glue.  Feel free to remove the background fabric from behind the lemon peel if you think you might be hand quilting the sampler quilt at some point in the future.  
This  block should be set straight and will be the last of the yellow sampler blocks.  

Monday, February 25, 2019

Yellow and Grey

 Sydney and her friend both got yellow ribbons on Saturday for 4th place at science fair.  Not quite the best of show and runner up they earned last year, but they moved up from middle school to high school and have to pay some dues.  Sydney is excited to improve her project for next year and got some great advice from judges to make her dye-sensitized solar cell work better. 
 Ryan's room no longer has super heroes and Pokemon on the walls.  I mixed up my own grey paint from the extras that Sydney used for her antibacterial paint project in 7th grade. 
Ironically, the shade worked out to be almost identical to one of the paint chips we were considering for the new house.  I think it is too blue for that, but for Ryan's room I think it is perfect.  It all looks kind of sparse now that the walls are so empty.  I might get a throw rug to add some interest.  We are getting close to the end of the list of things we wanted to finish before we put our house on the market.  Any day now!

Saturday, February 23, 2019

ScrapHappy Saturday 7

Sewing is taking a back seat at the moment to house preparation.  We've made and offer (third time's a charm) on a townhouse which has been accepted.  Inspection and appraisal have been scheduled, and if those both go well, we'll be putting ours on the market.
And so begins the preparation.  Ryan's room used to be full of superheros painted on the walls.  Now is is grey. 

I finished up the quilt that has been sitting the frame since break and started to box up the quilting machine.
That will allow me to take down the frame and turn bedroom number 4 back into the guest bedroom/study again.  
I think between all of that, my yellow design board looks just about the same.  
It is science fair day today, but maybe tomorrow I can sew something yellow?  Until then,  I will enjoy all of the yellow that you have to share


    An InLinkz Link-up
   

Tuesday, February 19, 2019

Tiny Tuesday #8


Our guest designer today is Mari from Academic Quilter.  You probably remember her from last year's Squared Away sampler.  Today she has made a lovely tiny yellow flower block for us all to enjoy.  Here is a link to the PDF file for those who are saving the patterns.  This one is to be set on the diagonal.  I've mostly finished updated the RSC19 Sampler tab if you are looking for all the blocks in one place.  I just need to make the PDF files for the past two weeks and update those last couple of links.  

Saturday, February 16, 2019

ScrapHappy Saturday #6

And so continues the yellow.  It is a short month, but I am happy to say that it is also a long weekend.  My dear husband is away helping his dad to move, my youngest daughter is having a sleepover after a lacrosse tournament and my son is away always during robotics season.  That leaves just me and the sewing machine that I was finally able to pick up after repairs.  Can't wait to finally fire it up again.  I am looking forward to many more yellow blocks up on my board before next week.


    An InLinkz Link-up
   

Tuesday, February 12, 2019

Tiny Tuesday #7

More 3 x 3 blocks are here this week.  I just couldn't put the 2 inch squares away without making a few more blocks.
First up is an Ohio Star that I saw on Quilting on the Crescent a couple of weeks ago.  So cute!  Generations Quilt Patterns has a perfect tutorial in their quilt patterns library.  Start with 2 3 in squares in yellow and in background.  Use the same draw a line and sew on either side method we used last week, but then repeat with the finished half square triangles to make quarter square triangles.  You will need to square them up to a 2 inch size as they are slightly oversized.  Do this twice to make 4 required half square triangle units.  Fill out your necessary nine units 2 inch squares, 4 background color and one yellow.  
Here is your 3 by 3 layout
And finally, your finished block!
Next up is a Friendship Star.  It uses exactly the same sub-units as the churn dash from last week, but with the triangles rotating around the center square.
It is a quick an simple variation on a theme.
Choose your favorite from the pair or feel free to make both blocks if you are hoping for a bigger quilt.  These blocks are set straight.  I promise I'll branch out a bit next week.  We can be done with the three by three grid for now..


Saturday, February 9, 2019

ScrapHappy Saturday - Yellow Begins


And so begins the yellow month!  I'm off to a slow start as it has been quite a busy week at work.  I made my Tiny Tuesday blocks of course, and dug out all the existing yellow bit I had left over from last year.  I also cut a nice stack of squares for sprouts and framed nine patches, but they have not made it all the way through to the end yet.  I hope that you are all finding some time to sew.  Misterlinky is below, please share your progress so far. 
    An InLinkz Link-up
   

Tuesday, February 5, 2019

Tiny Tuesday #6 - Nine Patch and Friends

Nine patches are the ultimate all-purpose grid for quilt blocks.  It also just so happens that it is a size that works out beautifully for Tiny Tuesdays 5 inch blocks (4.5 inch finished).  Before you dismiss the humble nine patch, start to think about some of the classic quilt blocks that are built on a 3 by 3 grid.  Churn Dash.  Ohio Star.  Friendship Star.  The list could go on.  I'll show you the basic nine patch first and then Shoo Fly, which is a nine patch with half square triangles in the corners.   
 Start with 9 2 inch squares.  I did 4 light and 5 dark, but you could reverse that for a slightly different effect.
 Lay the two inch squares out in an alternating pattern.
 Stack row two onto row 1, right sides together.  Chain stitch the tree pairs together, keeping them joined.
 Open row 1 and 2 and sew the third block to the end of each block in row 2.  The webbing really helps to make sure all the blocks stay in the right order.
 You can press now or later.  I did it now so that you could see the seams pressed toward the dark fabric.  This will allow the seams to nest nicely.
 Press your final block while you ponder all the variations you could whip up starting with this simple block.
 Shoo Fly is another nine patch block.  Just with half square triangles in the corners.  There are so many ways to make a half square triangle.  I usually use my handy dandy easy angle ruler for large batches, but for just 4 HSTs, sewing larger squares along the diagonal and then trimming them to size seemed easier.  You will still need 5 2 inch squares (1 dark and 4 light).  In addition you will need 4 2.5 inch squares ( 2 dark and 2 light).  I had 3 inch squares on hand, so I used those.  They will be trimmed at the end, so the exact size isn't critical here.  The rule  says to add 7/8 an inch to the finished size or 1 inch if you plan to trim them down.
 Draw a line on the back of both light squares.
 Place light and dark squares right sides together.  Sew a quarter of an inch from both sides of that line.  Use scissors or a rotary cutter cut on the drawn line.
 Square your 4 HST units up to 2 inches.
 Lay all 9 squares out with the HST units in each corner.  If you moved the HST units to the center of each side you could also make a friendship star right now.  If you replaced the light squares on the edges with a set made from 2.25 inch strips, you could make a Churn Dash.
This time I pressed away from the HST units in order to reduce bulk.  You may choose either block if you are on schedule for the 49 block quilt.  Feel free to make both if you are looking for more blocks.  This week is a diagonal setting.  

Saturday, February 2, 2019

ScrapHappy Saturday #5 -- Sunshine Coming My Way

Look at how organized my yellow scraps are!  I almost hate to mess them up.  Almost.  I will need 2.5 and 2 inch squares along with enough pieces to make some Tiny Tuesday blocks.  Those will make a bit of a dent I hope.  Ryan is off at robotics all day and Sydney is at a sleepover, so it should be calm for the most part.  
I used up a ton of crumbs and orphans in this yellow scrap bin.  
 It makes such a nice addition to my slowly growing collection of rainbow scrap bins.  Wouldn't it be nice if someday I could get all my scraps to fit in these and downsize the ugly plastic drawers?  Time will tell. 
 I'm so happy to have a weekend!  We've been working to get our house ready to put up on the market and shopping for new houses on the weekend.  We put an offer something we thought would be perfect and then got outbid by snowbirds paying cash.  That happens a lot around here.  Then they got cold feet and almost backed out, which gave us hope again, but I think they've officially closed now so we can move on from that.  We have our eye on another property now that is in terrible shape, but we think it would be fun to redo it.   While all of that is going on, we are slowly working on getting our house ready.  I cleaned the grout in the kitchen.  It is so shiny and clean!  That is just one on a long list though. 
Digging in to the yellow scraps will definitely go first on the list.  I could use a bit of sunshine and happy right now.