Saturday, January 29, 2022

ScrapHappy Saturday - Week 5 Wrapping up Red


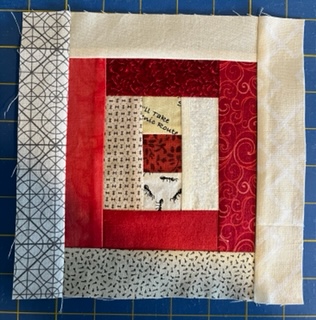
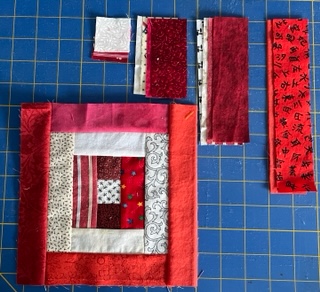
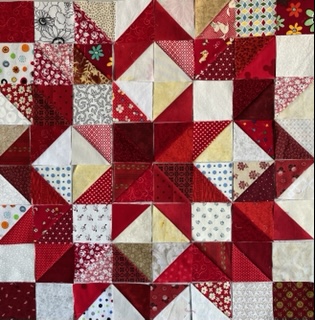
I hope that you have all made great progress on your red scraps.  It is time to start thinking about finishing up with red and getting ready to pull out your aqua and teal collection.   I have to admit being addicted to these transitional colors mixing blue and green since we've moved to the beach.  I've done about as much with red as I can for now.   Starting from the top: Bullseye blocks, Carpenter Star, Tiny Log Cabins, Blackford Beauty, 6 inch crumb blocks and 4.5 inch postage stamps.   
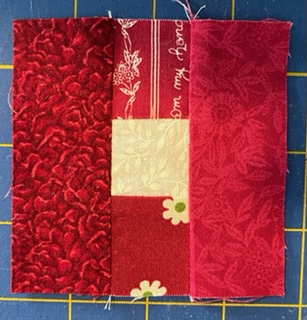
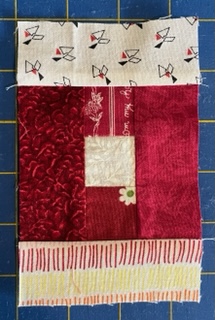
These red cross transition blocks might be at an end for this month as well, not because I am out of red, but because I have used up all the random scrappy 16 patches for now.   
Please share your red progress for the month.  Looking forward to enjoying some warm tropical ocean colors -- outside is chilly right now!

Saturday, January 22, 2022

ScrapHappy Saturday Number 4


The red wall is getting full!  I worked on the Monday holiday making more tiny little log cabin blocks.   
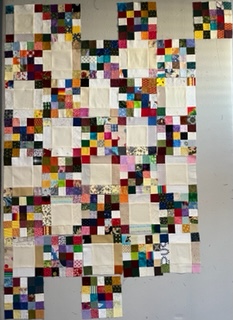
The 16 patch blocks rotated to the second wall and more alternate blocks are appearing.   I didn't have as many multicolor blocks as I thought, most of them are monochromatic.  I'm not sure if I want to separate the two or try to work them in strategically to the same quilt.   

4 Weeks in and I have made a nice dent in my red scrap bin.  How are your red project developing?  Misterlinky is below, please share your progress.  

Sunday, January 16, 2022

Playing with Scraps on a Rainy Sunday

I did some organizing and sorting over the break and made a mental list of block collections in need of love.  The two inch squares bin had a lot of randomly scrappy nine patches.  I was thinking that I could add some consistently colored star points to turn them into Sister's Choice blocks.  Here are my test blocks.  I will let them simmer until the green month comes up.   
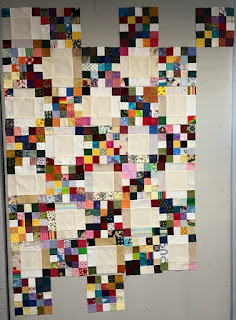
I have made as many Irish Chain blocks as will fit onto one design wall.  I'm almost out of the partial blocks.  I'll need to do some math now and figure out how many to make.  I think enough for a twin sized quilt.   If 63 by 87 is a standard twin size, then that is 9 by 12.  I'll need a border as well, so I should make the center 8 by 11.  88 blocks divided evenly between the two types makes 44.  It looks like I've got 30 right now.   So I'll make a note that I need 14 more of each block and set this one aside for now.   
Finally, the red wall!  I spent most of yesterday on crumbs.  I was thinking of turning those into placemats and potholders.   I've finished most of the main projects for the month and was working some cross blocks through to alternate with random scrappy 16 patches.  I think that I will move those over to the empty wall and continue on those as leaders and enders.   So I guess that I have a lot of background projects and should think about a main project, but I always seem to get carried away with scraps instead.  It is a cold and rainy day in Florida, so staying inside where it is warm and dry sounds like a wonderful plan.   Sydney and I are seeing the hand surgeon tomorrow.  Hopefully he will have some good news for us.  She is doing pretty well with just one working hand so far, but patience is not her strong suit.   I'm off to Oh Scrap! for more scrappy inspiration and will catch up on yesterday's ScrapHappy Saturday posts as well.   I got pretty carried away sewing yesterday and never took a computer break.  

Saturday, January 15, 2022

ScrapHappy Saturday -- Week 3


What a long strange week it has been. Today I am thankful for three day weekends. It means I might make it though next week. As you might guess, COVID is in full swing here. Because the schools are prohibited by law from doing anything to mitigate the spread, it is running through fast and hard. Some kids choose to wear masks, but mandating of masks and quarantines are both forbidden here. And so we cover for sick teachers when the sub pool has been depleted and hope that it gets better soon. There is a daily influx of emails from students about makeup work.   I am also thankful for Google Classroom so that I can post everything digitally.  I can't imagine trying to keep up with emailing work to 20 kids every day with three different preps.  For the most part at least one member of each lab group has been present and able to share lab data with those at home. I am also thankful that they all stay in contact digitally so the absent kids are aware of what we are doing.    

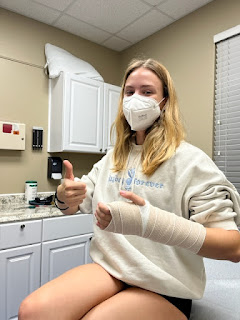
 Just as I was settled into the new COVID routine at school Sydney decided to fall down at Lacrosse practice and may have fractured her wrist. They had her casted and ready to discharge before the radiology report came back. He thinks it is a bone spur and not a fracture at all. So on Monday we will see a hand surgeon and he can break the tie. A fracture would probably be the end a season yet to begin.  She is in good spirits and finds it all incredibly funny so far.   That might change it it last for longer than the weekend.
I am caught up on my reds for the most part and hope to make some progress on these Irish Chains.  I need more alternate blocks and then I can dig into the partially assembled nine and four patch bins to puzzle some more of the main blocks together.   It is strange to work with randomly scrappy blocks after spending so many years on one color at a time.   I also have a bag of red crumb blocks for placemats and some tiny scraps to use for little log cabins.  
I hope you have some fun sewing plans for the weekend as well.  Mr. Linky is below.  We would love to see what you have going on with your red scraps so far.   
  

Sunday, January 9, 2022

Sunday Wrap Up

The sunrise was subdued this morning.   It is a bit chilly so far but promises to warm up as the day progresses.   
I am making good progress on my red scraps.  I dreamt last night about making placemats out of crumb blocks.   Here is my wall so far:  starting at the top, I've got bulls-eye blocks which are a courthouse steps variation from 1.5 inch strips, Carpenter's Star, which is just HST units from 2.5 inch strips with a few squares, and finally Blackford's Beauty blocks from 2 inch strips.  These are my 3 main Rainbow Scrap Challenge projects for 2022.   I've saved the tiny scraps for paper pieces mini log cabin blocks.  

While working through my red scrap bin, I've also been adding some alternate squares to these scrappy Irish Chain blocks.   So many scraps all used up!  How is it that I haven' run out yet?  Visit Oh Scrap!  for more scrappy projects.   


Blackford's Beauty

 Blackford's Beauty is a classic quilt block which is apparently named after a river crossing in Maryland that was used by the confederate army during the battle of Antietam.  I found some background info on the Upstate Heritage Quilt Trail Website as well as Quilter's Cache, in case you are a quilt history buff.   I love to make four patches and nine patches as thread catchers or leaders and enders between quilts blocks and always keep my eyes open for blocks that will use these random units.   

In searching through all of my quilt block book collections, this one stood out.  I love anything with a star and there are lots of four patches in there that are happily scrappy and perfect as leaders and enders.  As I started to do research, I found the Bonnie Hunter Version called Jared takes a wife.   She has a great tutorial which uses flip and sew corners on strips for the chevron star points.  It gives the star points with one center seam and yields 16 bonus HST units per block. I do enjoy the look of this block, but fumbled through the directional star points and had to remake several while trying out the pattern.   I'm also trying hard to reduce my scraps which made me look for something without "bonus" triangles.   
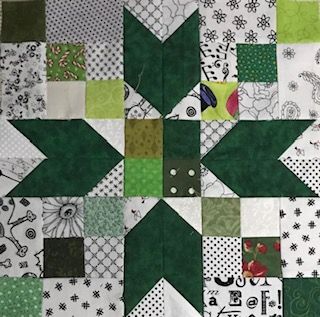
I made this first trial version using Bonnie Hunter's method and then decided to change the center star points to a black solid.   I am also using solids for the star points to unify the blocks and contrast with the random scrappy corner units.  
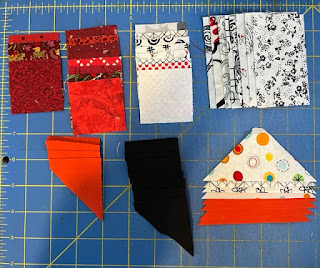
Having seen several diagrams with alternative sewing options, I also wanted to try this block with flying geese unit.  This plan assembles each star point from two different color arrangements of flying geese and has 7 pieces, but no flip and sew corners.   While I don't enjoy the seam lines quite as much, I found it easier to work these in as leaders and enders because the geese are symmetrical and easier to keep track of between other blocks.  
One set of flying geese has a light body and dark wings while the other has a dark body and black wings.   You need four of each, which is super handy if you plan to use the Four at a Time Flying Geese method.   I have used this technique before and really enjoy it.  The flying geese for this block will finish at 1.5 by 3 inches which means that you will need 4 wing squares at 2 3/8 and one body square at 4 1/4.   
For more traditional piecing, just cut your 4 1/4 inch square on the diagonal both ways to yield 4 bodies and cut your four 2 3/8 inch squares in half once on the diagonal to yield 8 wings.   Here is a page with four methods explained
You could also easily cut these units with your Accuquilt die cutter if you have one, the HST and QST units are both part of the 12 inch block cube as well as the 6 inch block cube.  
OR, just use flip and sew triangles on 2 by 3.5 inch rectangles.   The fun thing about flying geese is that are are so many ways to make them.  Choose the method that works for you.

I prefer to pull from my pre-cut strip bin though and usually rely on specialty rulers instead of trying to find scraps big enough into cut randomly sized squares.  It all depends on how you store your scraps. 
  The body of the goose comes from the companion angle ruler and a 2 inch strip.  
The wing of the goose comes from a 2 inch strip cut with the easy angle ruler.   


For the corners: 
  • 12  dark squares (2 inches)
  • 8 light squares (2 inches)
  • 8 light strips (2 inches by 3.5)
For the center:
  • 4 dark squares (2 inches)
For the star points:
  • 4 light geese bodies
  • 8 dark wings
  • 4 dark geese bodies
  • 8 black wings
  • 4 dark rectangles (2 by 3.5)

Start by making the geese using the method of your choice.  I am showing the specialty ruler method.  It would look the same if you had cut your units from squares or with a die cutter.  The four at time method or flip and sew method would look slightly different during, but yield the same flying geese in the end.   
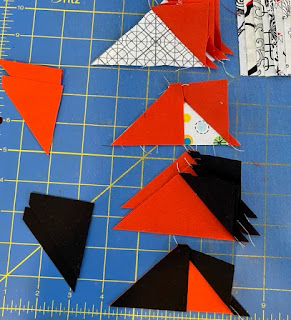
Sew one wing on your geese and press before adding the second wing.  Notice the color arrangement.   Four geese are dark on white, while the other four are black on dark.   
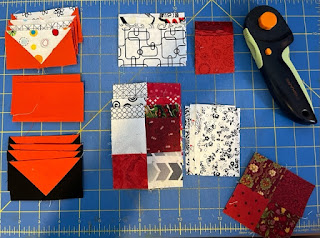
While you are sewing your geese together, work your four patches through, first as pairs and then into fours.   There are four four patches made of light and dark and one made of all dark for the center.   

The next step is to sew build your four patches up by adding a light rectangle to one side.  The other half of the light rectangles get a dark square sewn onto one end.   Press the seam on these two units in opposite directions.  I pressed toward the dark square and the light rectangle toward the four patch.  This seems counterintuitive, but it helped the seams nestle when they were joined to the star points in the last step.   
For the star point unit, I pressed away from the geese and toward the center rectangle on both sides.   

While these are working through the machine, sew your star points together.  Each one has three parts
  1. dark and black goose pointed up
  2. rectangle of dark
  3. light and dark goose pointed up.  
add the last side your your four patch and you are ready to assemble your nine patch block.  
The black star points form a star around the center square and the dark squares in the corners form a diagonal toward that same center.   Just sew this block as you would any nine patch block.  Press away from the star points as this is where the more complicated diagonal seams are likely to be problematic.   
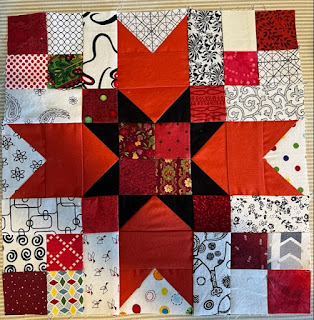
Here are my four red Blackford's Beauty blocks for January.  I plan to make 4 of these 12 inch blocks each month and then set them together with white lattice strips and black cornerstones.   You can see the Bonnie hunter chevron method as well as the flying geese method both side by side here and decide which method will work best for you.  I'm still torn between the symmetry of the goose method and the linear seam of the chevron method.   

Saturday, January 8, 2022

Week 2 ScrapHappy Saturday

It is red week number 2 already!  I hope you are all getting a chance to dig in and play with your scraps.   I have worked my way through the 1.5 inch collection already so today I will tackle the 2 inch strips.   Blackford's Beauty is my plan for these guys. I've been saving the solids specifically to unify the star points.   Looking forward to seeing what scraphapiness everyone else is up to.  This is the awkward time of the year when I try NOT to start every new project I see on someone else's blog.  
As far as local news, friends have been sending me this link to an article about our little corner of Florida.  Covid is in full swing here, hoping for a quick spike on this one as the numbers are just unimaginably high.  I'm starting to run in to a lot of people having their second case.   I am in the minority so far having not been pulled on my planning to cover for sick teachers without subs. I think they have sympathy for the batch that had Covid over the break as we aren't all fully functional again.  Thankfully it was a short week though and I have a weekend to rest and recharge before heading into the battle zone again.     


Wednesday, January 5, 2022

Light Bulls-Eye

1.5 inch squares - 2 white, 1 dark
3.5 inch strips - 2 white, 2 dark
5.5 inch strips - 2 white, 2 dark
7.5 inch strips - 2 light

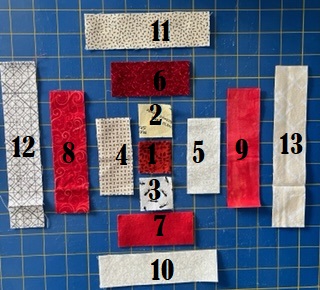
Here are all 13 pieces in a blow up of the layout. 
Start with a dark square and sew a white square to either side.  Press away from the red.   

Add a 3.5 inch strip of white to either side of your center unit.   This completes round 1
Start round 2 by sewing red 3.5 inch strips to the top and bottom of the completed round 1.   
Add 5.5 inch strips of red to either side to finish round 2.   Continue to press away from the center
Begin round 3 by sewing 5.5 inch strips of white to the top and bottom of your center square.   
End the block with 7.5 inch strips of white sewn to either side of your center unit.
 

Dark Bullseye tutorial

I started with a courthouse steps block for my 1.5 inch strips this year, but as I started making test blocks, I decided to do a bulls-eye layout.  To get the final design, I will make half of them with dark centers and half with light centers.  

 Each block has 13 pieces, but they are all rectangles of increasing lengths cut from 1.5 inch strips.  That makes it easy to collect and organize.  The length are 1.5, 3.5, 5.5 and 7.5 inches. 

1.5 inch squares - 1 white, 2 dark
3.5 inch strips - 2 white, 2 dark
5.5 inch strips - 2 white, 2 dark
7.5 inch strips - 2 dark

Here are all 13 pieces in a blow up of the layout.   

Start with the center light square and sew a red square to either side.  The nice thing about the courthouse steps layout over the more traditional log cabin set up is that you can sew two strips before needing to press.   The pressing direction isn't supe important because there aren't any interlocking seams, so I just generally press away from the center of the block.   
Finish round 1 by adding 3.5 inch strips of dark to either side of the center.  

Begin round 2 by adding a white 3.5 inch strip to either side of round 1.  Notice that you are sewing onto the pieced side and not onto the unpieced rectangles.   

Finish round 2 by adding 5.5 inch strips of light to either side of  your block.  Keep your size correct by using the cut strip to make sure the pieced unit is the right size.  I always figure that the freshly cut strip is more likely to be the correct size than the pieced unit, so I use it a a guide.  

Round 3 begins by adding 5.5 inch strips of dark to the top and bottom of your block.   Press each round before adding another pair of strips.  

Round 3 is finished by adding 7.5 inch strips of dark to either side.  Your unfinished block should be 7.5 inches.   
My plan is to make 5 dark and 5 light blocks each month which will give me 100 blocks before the end of the year.   


Tuesday, January 4, 2022

Day 4 of 2022


I think that I have firmed up my block plans for #RSC2022.   The Courthouse Steps block have a bulls-eye layout and the broken dishes stars have morphed into a Carpenter's Star.  The Blackford Beauty block is solid though!  It was a quiet day of puttering in the sewing room.  We got a three month trial of Apple TV with a new phone and so I was watching The Morning Show while ironing and trimming.   My red scraps are trimmed nicely into strips, rectangles and squares of the appropriate shapes and size.   By big event of the day was another beach walk at low tide.  

It was on odd sunrise this morning.  There was a lot of cloud cover so it took a while to show up and them quickly darted back into clouds again.   This morning was cold and drizzly, but it turned into a nice afternoon again.   Given the images of so much snow up north, I will enjoy a little damp morning spittle gladly.   


Monday, January 3, 2022

Day 3 of 2022

 I guess I will keep counting days until I get too busy to post on a day and loose track.  Most likely when school starts again on Thursday.   Not looking forward to the Covid fueled mess that is going to be.  We have no authority to mandate vaccines, masks, testing or quarantines.   With no way to fight back, it will just be a matter of watching it work through the students and staff.  I pray that no-one else will die before it is done.   

The sunrise this morning looked like an egg, sunny side up.  It was hazy and drizzling.  Almost before it had cleared the horizon, the sun was behind clouds for the rest of the morning.   


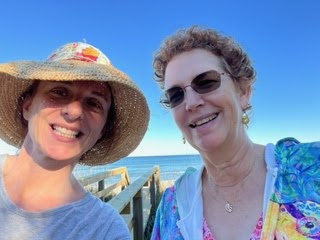
The afternoon turned beautiful though.  Here is my friend Linda who retired this year.  Look how relaxed and refreshed she looks!   We had a nice long beach walk at low tide and caught up on all the gossip.  

I am spending my last few days of vacation working through and inventorying of WIPs, UFOs, PIGs and orphans. 
Bins 1 though 4 are my designated Rainbow Scrap Challenge projects for this year.   That is one for each week of the month.   
  1. Courthouse Steps from 1.5 inch strips
  2. Blackford's Beauty from 2 inch strips and squares
  3. 2.5 inch HST units now designated for Carpenter's Stars
  4. tiny paper pieced log cabin blocks are ongoing
Here is the plan for the Carpenter Star blocks.  It is my third try for the HST units I've started.   I saw this post at Sane, Crazy, Crumby Quilting and was inspired.     
5 is my only official WIP that isn't part of the RSC.  It is aqua churn dash blocks meant for Ryan's bed which he took with him to college.   I might turn it into something smaller instead.   Bin 6 is a collection of pieces for a double wedding ring quilt that I started cutting with an Accuquilt die that I haven't gotten out since the move.  I might try to make space to set that up and focus on starting some collections of fabric pieces ready to sew.   Bin 7 isn't a UFO at all but a collection of 10.5 inch squares to use for quilt backs.    
Bins 8 and 9 are also not quilts but collections of blocks from 2.5 and 2 inch squares. 
Pulling out the bin of 2 inch squares inspired me to take stock of the Irish Chain blocks that were leftover from an earlier quilt and should be enough to start the next one.   I don't often make the same pattern again, but I think this will be my third iteration of this quilt.   
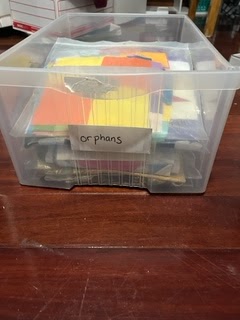
That just leaves this one drawer of orphans.  Thanks to a bit of organization and sorting, it is able to close again.  Most of these are extras from trying out new patterns or writing tutorials.   I will try to focus on turning these into smaller quilted projects.  Quite a few potholders, placemats and table toppers could easily come out of this bin.   That will allow me to participate in the Table Scraps Challenge with The Joyful Quilter who is always such a great cheerleader for RSC.   

If you are also on an organizational quest, Stephanie has been kind enough to make tracking sheets for us again this year.  They are available in editable as well as PDF formats.  Feel free to make a digital copy or print one out as you track your own RSC22 projects. This can be especially helpful if you are carrying over projects from last year that only need certain colors.   
I will also add the links to the RSC22 page as well as next weeks linky party to make sure everyone gets a chance to see them.