This block will need a combination of 3.5 and 2 inch strips. The darker green strip is 3.5 inches. The lighter green is 2 inches. Add to that a 2 inch strip of background and you will be ready to go.
Start with the darker green. Use the easy angle ruler to cut 4 HST units. The sizing on these is always easy to figure out. For whatever size square you are making, just cut strips the same size as the unfinished unit.

Next you will deal with the 2 inch strips. Figuring out the strip size for quarter square triangle units is a little bit trickier, but when using the companion angle ruler, they have given us some help. This time you are dealing with the finished size of the square you will be making. Because our subunits are 3.5 inches unfinished, that means 3 inches finished. Looking at the ruler, just find the large number along the edge that matches your finished block size. Notice that the three along the edge is on the same line as the 2 with an arrow in the middle? That means that to make a 3 inch finished block with quarter square triangles, you will need to use 2 inch strips. You can layer your green and background together if you are feeling bold, or cut each color separately. Either way, you will need four triangles of each color.
Here are your pieces ready to sew:
4 large triangles in dark green
4 small triangles in lighter green
4 small triangles in background color
For those of you who do not use specialty rulers, it is easy enough to cut these units from squares. For the smaller quarter square triangle, just cut a square 4.25 inches and then cut it into quarters from corner to corner along each diagonal. For the larger half square triangle unit, you will need two squares which are 3 7/8 inches, cut in half along the diagonal. There is a complete tutorial and sizing chart here.
There is also a method of sewing from corner to corner of uncut squares, but it yields two mirror image units which would result in your pinwheels spinning in opposite directions. Here is a link to a youtube video which explains how it works.
Start with the small triangles, layer them right sides together and sew along the short side of the triangle. Make sure all the triangles go through the machine in exactly the same arrangement. I did mine with the green on top. If you do some with the green on top and some with the background on top, the final block won't come together quite right. Trim dog ears and press the seams toward the green fabric.
Your pieced units should be exactly the same size as your large green triangles. Place them right sides together and sew along the long side of the triangle.
Here are your four finished subunits. Arrange them so that the long seams all point to the middle and the dark triangles rotate in a pinwheel fashion. If you have sewn your light green triangles consistently, they should look like they make a square on point behind the dark greens.
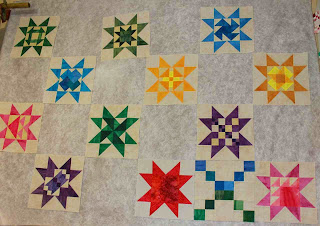
Here is your finished sampler block. Notice how using two different shades of green gives it a dimensional feel?
Now add your star points using the
tutorial found here. This is a three block month, so be sure to check back for the last sampler block and directions for alternate blocks.


