The large corner triangles for this block were cut from dark and light squares of fabric that were 4 7/8 inches. You could use 4.5 inch strips and the easy angle ruler, but for just one block, it isn't much easier. I always seem to have extra 5 inch "nickel" squares hanging out, so this seemed like a nice way to put them to use. Take one square of light and one square of dark and cut them both in half from corner to corner along the diagonal.
The smaller triangles I did cut from 2.5 inch strips. Place your dark and light strips together and cut 5 HST units.
I puzzled for a while about how to match up the triangle points, and finally decided to remove all the dog ears ahead of time. Just use one of the easy angle corners as a template and trim away the extra dog ear from each of the triangles.
See how much easier everything lines up now? Lay out your block with a large triangle in each corner. Next line up the hypotenuse of the light triangle up next to the dark square and reverse for the light triangle. Fill in with the opposite colors. Refer back to the picture to make sure you get everything placed just right. I was trying to figure out how to assemble this from half square triangle blocks, but eventually decided it would be easier to assemble diagonal rows.
Start with the dark HST units and fold them over the light triangles. Sew along the matched leg of each pair of triangles.
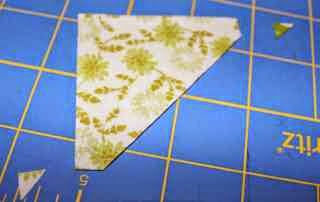
Press carefully. Remember that the long side of the triangle is exposed bias. Try to keep the iron over the short sides when you press toward the dark fabric.
Match up your pairs of triangles and repeat the sewing and pressing process. Continue to bring your subunits back to the original layout to make sure the pieces are facing the right way.
Now that you have four triangles sewn together, you just need to add one more triangle to the end of each block.
Sew, press and check your layout again. Light touches dark and dark touches light.
Sew a center row to each triangle. Mind your bias -- it can get out of hand.
Here is your block in two halves. I hardly ever pin, but I did pin these together to make sure the points all lined up just right.
There you go! Consider pressing the center seam open, I tried it both ways to see which helped the points lie down the best.


5 comments:
That's a nice green
Nice block and even better tute - thank you! I really like the fabrics you used.
Nice block
hey - just noticed you snuck this one in!
This one looks a bit challenging. Should be fun.
Post a Comment